
Getting Started
AWS CloudFront Standard Logs
Upload the Honeylog AWS template, create the CloudFormation stack, and verify delivery.
Use this guide when AWS CloudFront serves the website. Honeylog provides a template file that creates and connects the required AWS resources for you; you do not need to edit that file. AWS calls the group of resources created from the template a stack.
#Before you open AWS
Sign in to the AWS account that owns the CloudFront distribution for this website. Your account must be allowed to create CloudFormation stacks. If you cannot create one, send this guide and the downloaded Honeylog template to your AWS administrator.
#Step 1: Download the Honeylog AWS template
- Create the website in Honeylog and choose AWS CloudFront.
- In AWS, open
CloudFront > Distributionsand copy the value in theIDcolumn for this website. Paste it into Honeylog. - Download the Honeylog AWS template.
Before continuing, confirm that a file named cloudformation.yaml has been downloaded to your computer.
The public download above is a reference template and contains placeholders. For the actual installation, use the prefilled download from the private Honeylog installation page.
#Step 2: Create the stack in AWS
- In the AWS console search bar, search for
CloudFormationand open it.

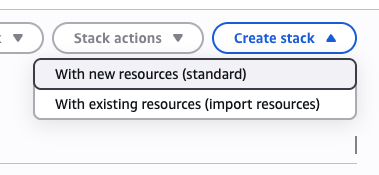
- Click
Create stack, then chooseWith new resources (standard).
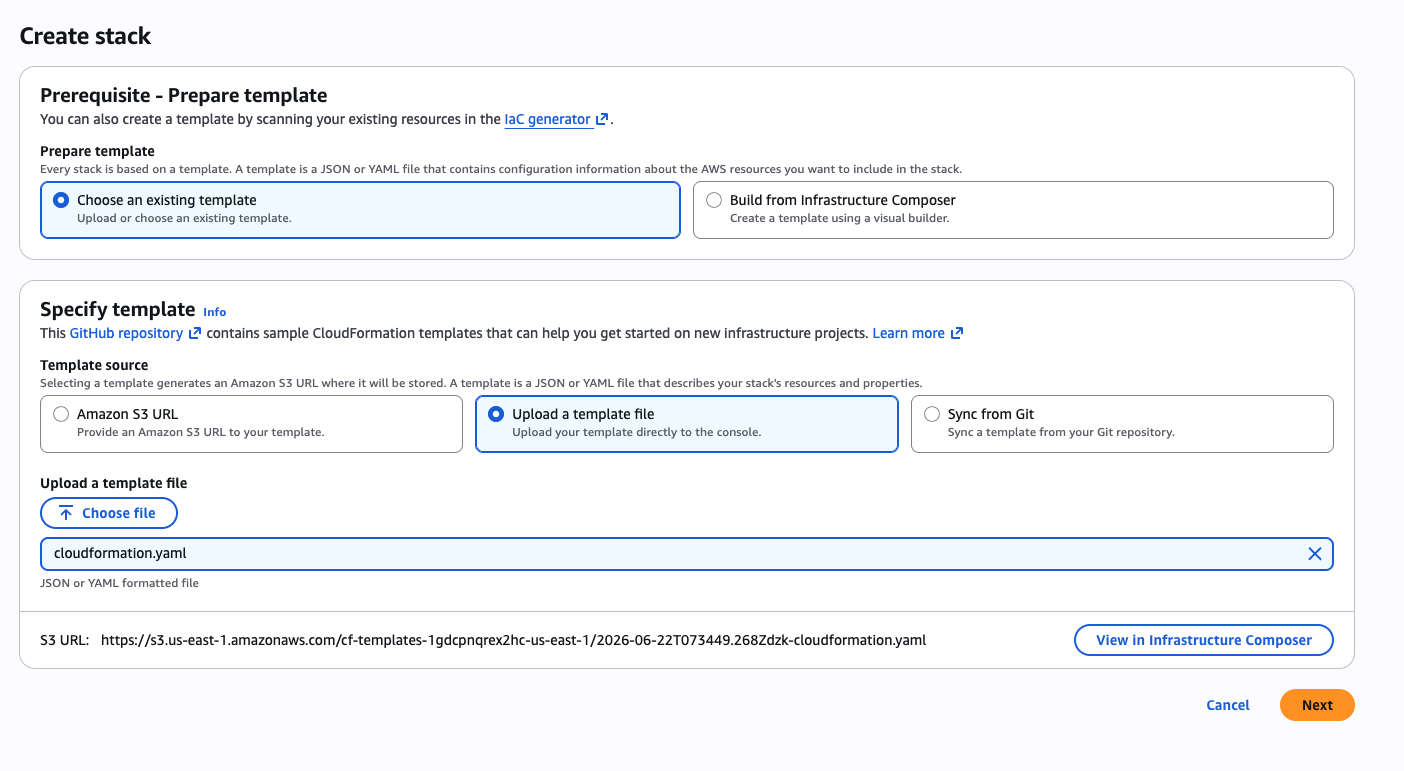
- Under
Prepare template, chooseChoose an existing template. - Under
Specify template, chooseUpload a template file. - Choose the template downloaded from Honeylog.
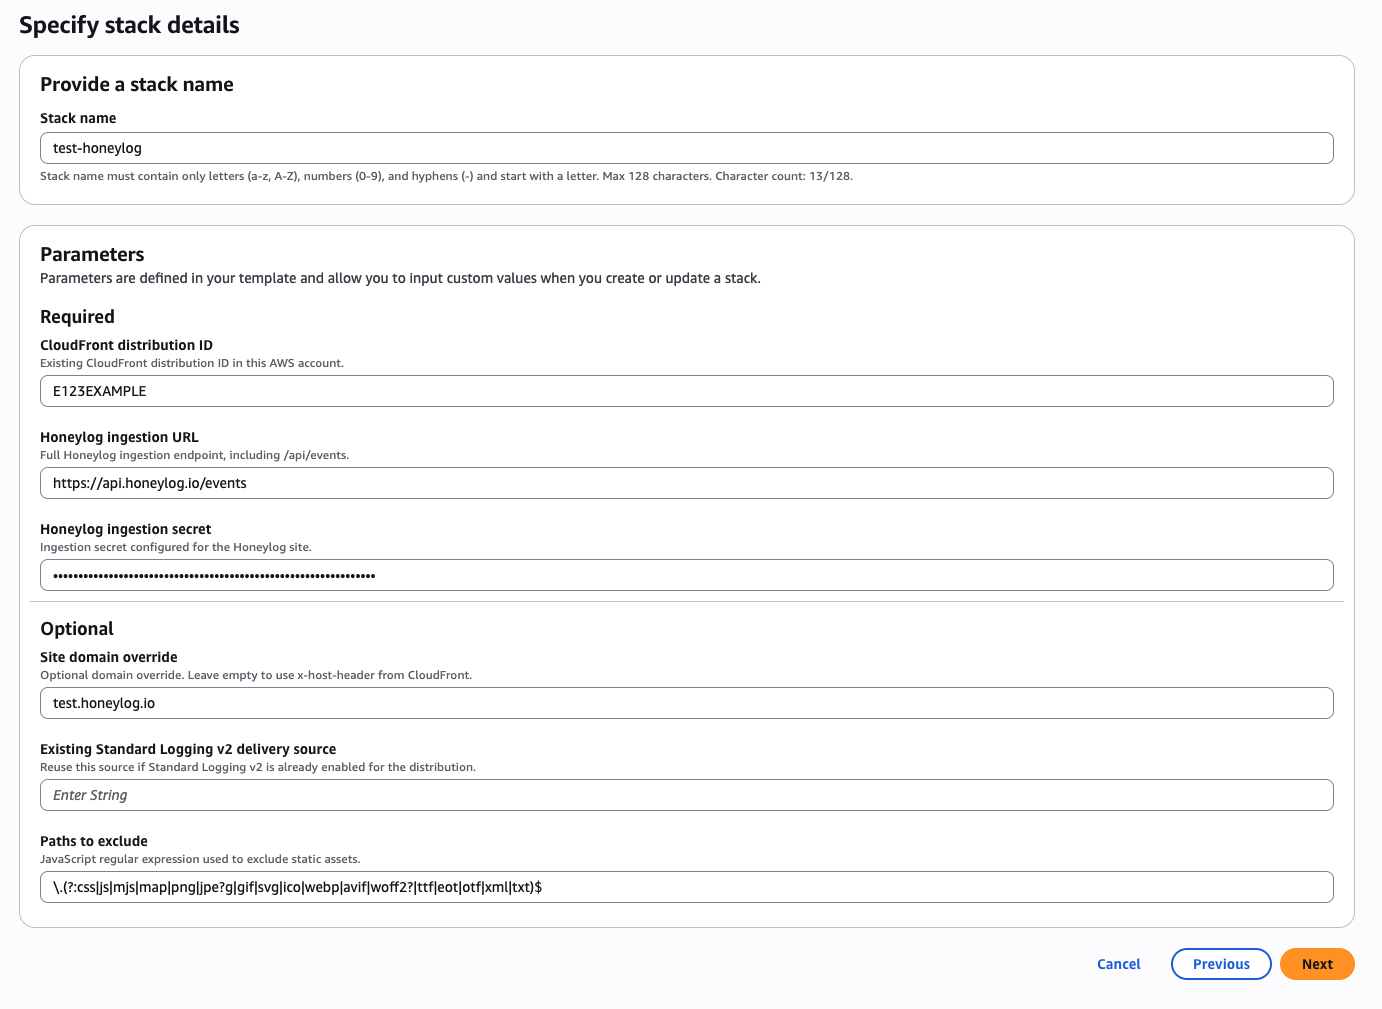
- Set a stack name that makes the website easy to recognize, such as
honeylog-example-com. - Review the prefilled parameters. They should match the CloudFront distribution and website selected in Honeylog; do not replace them with the placeholders from this public guide.
- Leave the stack options unchanged unless your AWS administrator has given you different instructions.
- Review the stack. When AWS asks for permission to create IAM resources, select the acknowledgement and create the stack. IAM resources are the AWS permissions used by the Honeylog components created by this template.
- Stay on the stack page until its status changes to
CREATE_COMPLETE. Do not continue while it showsCREATE_IN_PROGRESS.
CREATE_COMPLETE is the result required before moving to Step 3. If AWS shows CREATE_FAILED, open the failed event in the stack and send its error message to your AWS administrator or Honeylog support.
CloudFormation parameters:
DistributionId: CLOUDFRONT_DISTRIBUTION_ID
HoneylogApiUrl: https://api.honeylog.io/events
HoneylogIngestionSecret: SITE_TOKEN
HoneylogSiteDomain: SITE_DOMAIN
ExistingDeliverySourceName: ""
SkipPathRegex: "\\.(?:css|js|mjs|map|png|jpe?g|gif|svg|ico|webp|avif|woff2?|ttf|eot|otf)$"
#Step 3: Verify delivery
- Open several public pages through the website domain served by CloudFront.
- Wait a few minutes, then open the Honeylog website view and look for the new visits.
- If the visits appear, the installation is complete.
- If they do not appear, open the CloudFormation stack and select the
Outputstab. - Copy
AccessLogGroupName, then open CloudWatch in the same AWS Region as the stack. Go toLogs > Log groups, search for that name, and confirm that new access records appear when pages are visited. - Copy
ConsumerFunctionNamefrom the stack outputs. In CloudWatch, open the log group named/aws/lambda/ConsumerFunctionNameand check for recent errors. - Send any error message you find to your AWS administrator or Honeylog support.
Events can take a few minutes to appear. If AWS says that logging cannot be enabled for the distribution, the AWS administrator must remove that restriction before the Honeylog stack can be created successfully.