
Getting Started
Connect Fastly
Configure a Fastly HTTPS logging endpoint and attach the Honeylog response condition.
Use this guide when Fastly handles visits to the website. You will add a Honeylog logging destination to a draft Fastly service version and activate it after checking the settings.
#Before you open Fastly
Sign in to the Fastly account that manages this website. Your account must be allowed to clone, edit, and activate its service configuration. If not, send this guide and the private Honeylog installation page to your Fastly administrator.
#Step 1: Clone the active Fastly version
- Open the Fastly service that handles this website.
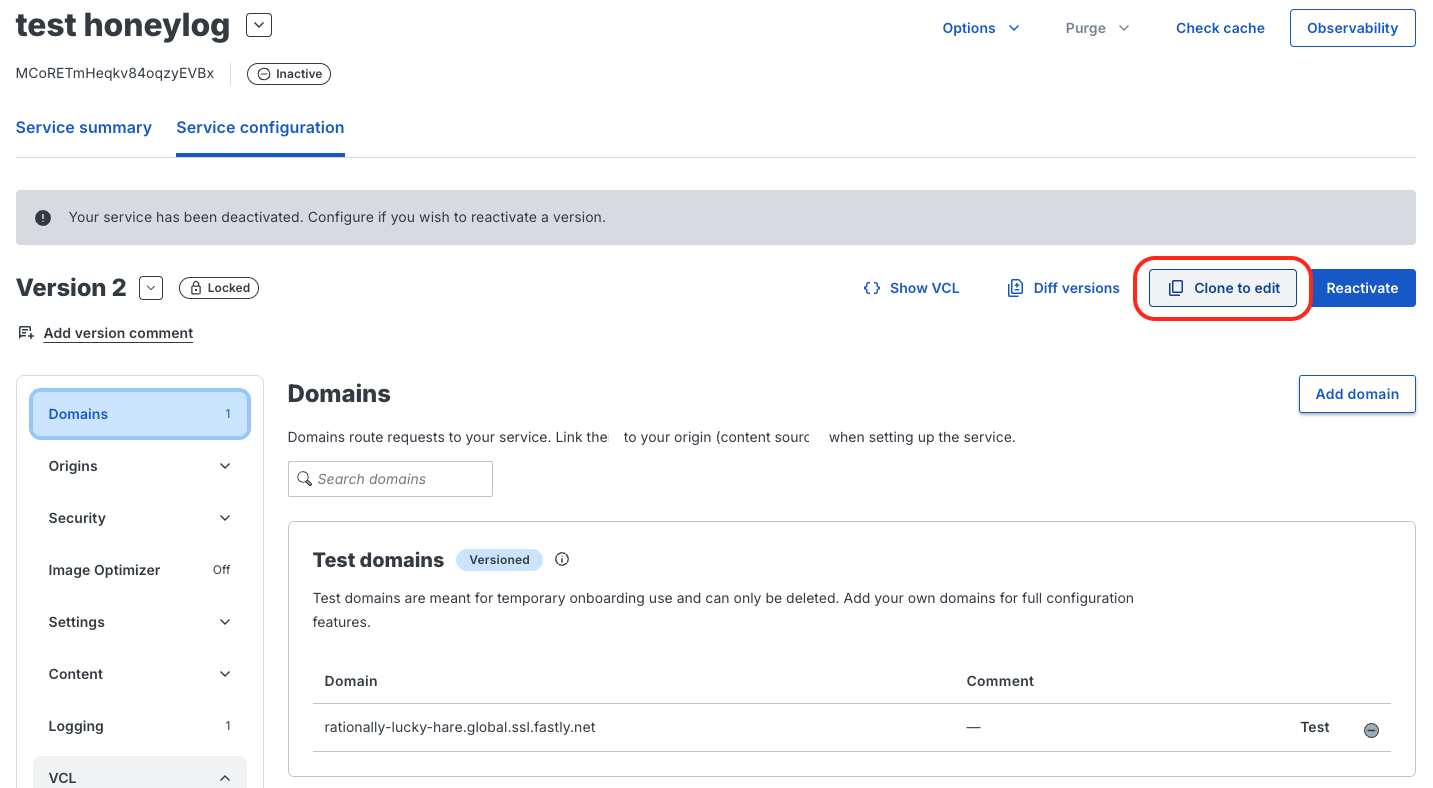
- Open the active version and clone it so the changes are made on a draft version.
- Stay on the cloned version for the next steps.
Before continuing, confirm that Fastly shows the cloned version as editable and that the currently active version has not changed.
#Step 2: Create the HTTPS logging endpoint
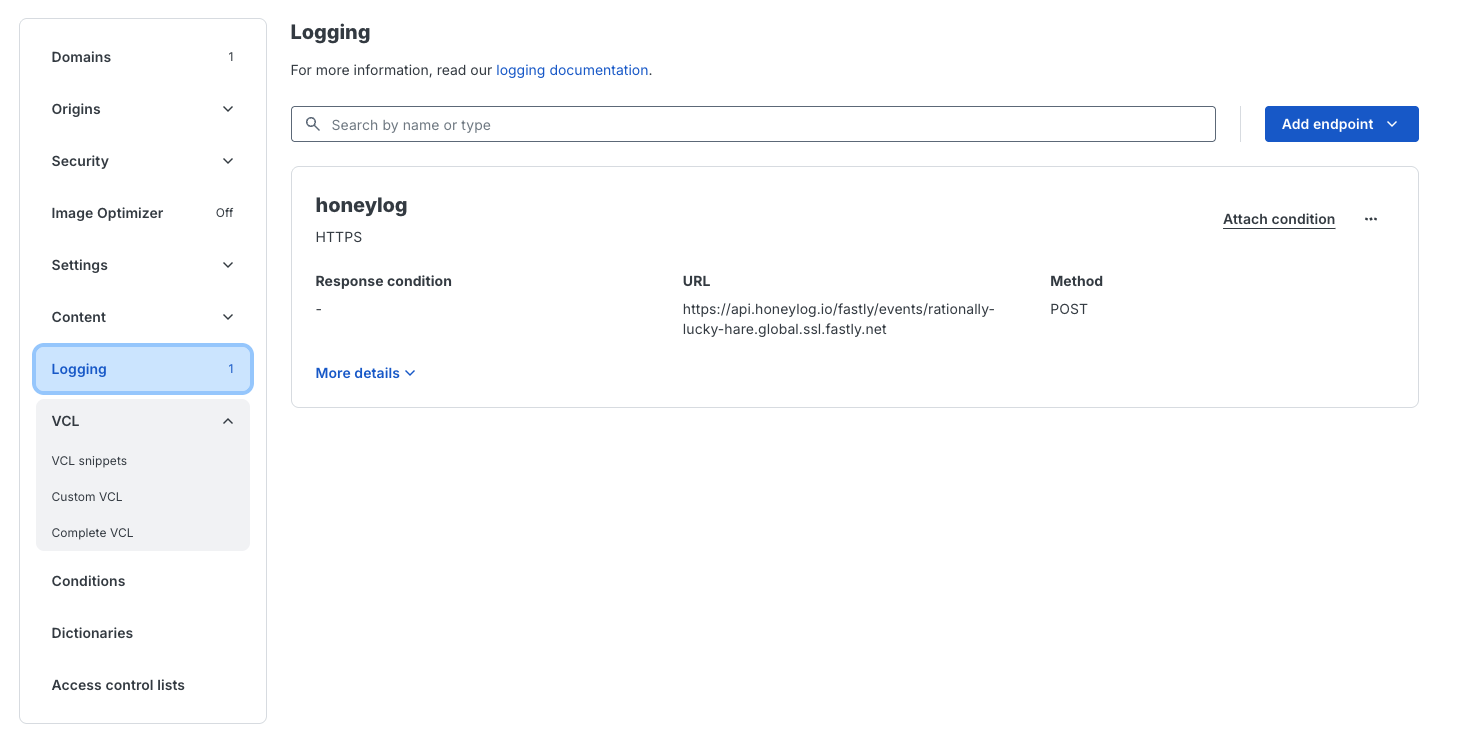
- In the cloned version, open
Logging.
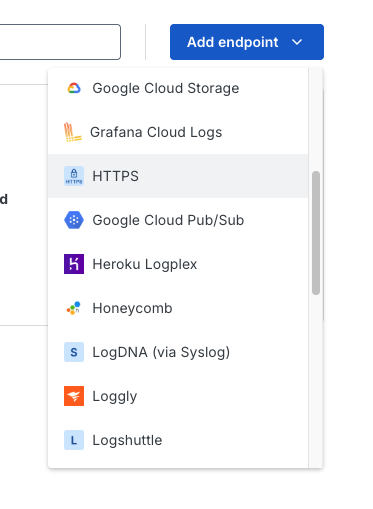
- Click
Add endpoint, then chooseHTTPS.
- Paste the generated Honeylog values into the matching endpoint fields.
Endpoint values:
Name: honeylog
Placement: Format Version Default
URL: https://api.honeylog.io/fastly/events/SITE_DOMAIN
Method: POST
Content type: application/json
Log line format: JSON array
Compression: gzip
Custom header name: Authorization
Custom header value: Bearer SITE_TOKEN
Use the personalized URL and secret from Settings > Installation > Fastly in Honeylog. Do not use SITE_DOMAIN or SITE_TOKEN literally.
Before continuing, confirm that the endpoint is named honeylog and that every field matches the list above.
#Step 3: Paste the log format
Paste the Honeylog log format into the Log format field of the HTTPS endpoint.
Save the endpoint and confirm that Fastly still shows the complete log format in the field.
#Step 4: Add the response condition
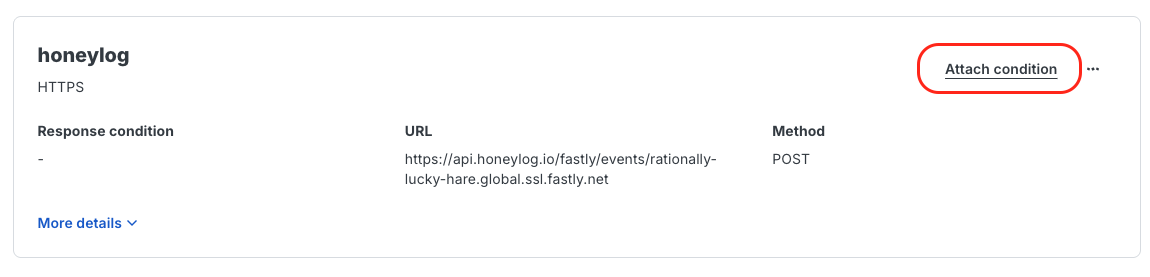
- On the
honeylogHTTPS logging endpoint, clickAttach condition.
- Keep the condition type set to
Response. - Name the condition
Honeylog conditions. - Paste the condition generated by Honeylog into the
Apply iffield. This rule tells Fastly which website requests should be sent to Honeylog. - Click
Attach.
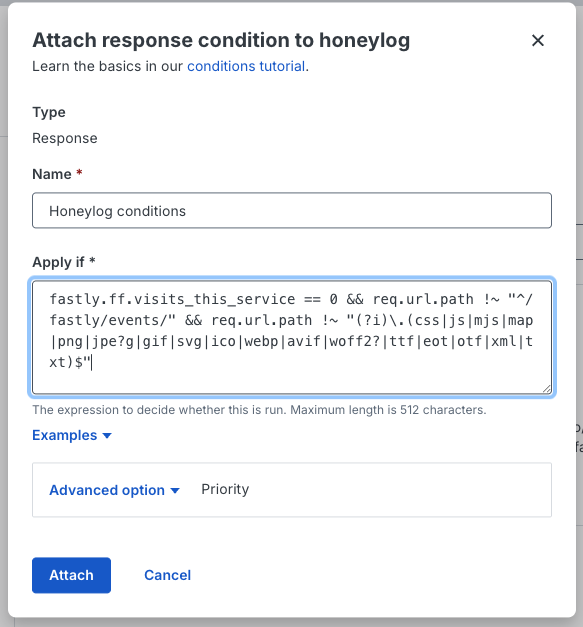
Before continuing, confirm that Honeylog conditions appears as the response condition attached to the honeylog endpoint.
#Step 5: Activate and verify
- Review the cloned version and activate it.
- Wait until Fastly shows that this version is active.
- Open a few public pages on the website.
- Wait a few minutes, then open Honeylog and confirm that the new visits appear.
Fastly may need a few minutes to start sending logs after activation. If no visits appear, open more than one public page and wait a few more minutes before troubleshooting.